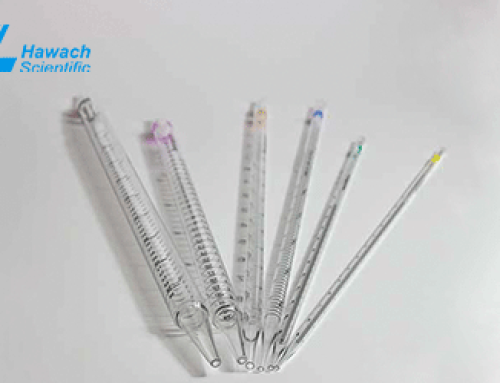
Use Filter Tips to Reduce Pipette Pollution During PCR Detection
For a large number of laboratories performing PCR, false positives caused by pipette contamination are not a rare case. PCR, especially RT-PCR technology, has gradually become a standard method for disease diagnosis. Such as the recent epidemic of COVID-19, RT-PCR results are one of the diagnostic criteria.
For PCR testing, false-positive results due to contamination of laboratory equipment cannot be ignored. Especially when the sample volume is very large, the detection room is often closed during continuous operation of the PCR instrument, where aerosols are diffuse and the instrument is easily contaminated.
The pipette is often the instrument that is closest to the sample and is used most frequently. It is very easy to be contaminated whether it is in the process of aspirating liquid or in the operating environment. Contaminated pipettes may introduce contaminated samples or nucleic acids into subsequent samples or PCR reaction systems, resulting in signal detection and false-positive results.


How can we reduce pollution?
Pipette contamination is likely to cause the risk of false positives in PCR experiments, mainly in the lower half. Contamination is divided into two types:
a. Contamination on the outside of the pipette body.
Usually due to centrifugation, shaking, or PCR heating, aerosols diffuse in the experimental environment and contaminate the outside of the fuselage. Or if the outside of the pipette body touches the inner wall of the micro-centrifuge tubes accidentally during operation, the pipette may be contaminated. In the subsequent experiments, you may accidentally touch the sample tube, micro-centrifuge tubes, etc., which may cause false-positive risks.
b. When aspirating liquid, the aerosol is contaminated by back suction or liquid suction.
If the filtered pipette tips are not used when handling the sample, and a misoperation occurs, causing the sample to be sucked into the pipette and not cleaned up in time, the subsequent samples may be contaminated and the risk of false positives may be caused.
The aerosol pollution during aspiration should not be underestimated. Taking a 20 μL pipette as an example, when the room temperature is 20 ℃ and the relative humidity is about 60% RH, the evaporation rate during aspiration can reach 0.046 μL/s, which is equivalent to Evaporate 0.23% of the total pipetting volume per second.
In this case, if the filtered pipette tips are not used, the evaporating liquid will inevitably entrain the sample and enter the lower half of the pipette, and blow into the subsequent sample in the subsequent operation, causing a risk of false positives.
Stop the operation for cleaning immediately after sucking back or accidentally touching the inner wall of the sample tube. Aerosol pollution can be reduced by regular cleaning.
How can we better disassemble and clean the pipette?
Take the Hawach pipette as an example. It has the advantages of easy disassembly and maintenance, easy replacement of accessories, and easy-to-calibrate technology. The pipette can be calibrated without tools. And the single-channel adjustable pipettes can be autoclaved at 121°C, which is especially suitable for PCR experiments.


The specific steps are as follows:
1. Use 75% ethanol or isopropanol to wipe the outer surface of the pipette for basic cleaning and disinfection
2. Rotate the lower half of the pipette gun, remove the lower half, and remove the piston, spring sealing ring, tip cone sleeve, and bullet tip sleeve by rotating.
3. Soak all parts of the pipette in 75% ethanol or isopropanol for 30 minutes. Take it out and rinse with deionized water.
4. Put all parts of the pipette in an ultrasonic washing machine containing detergent for ultrasonic cleaning for 10 minutes, take it out, and rinse with deionized water.
5. Depending on the severity of nucleic acid contamination, the tip cone sleeve, piston, and other accessories can be immersed in the glycine-hydrochloric acid buffer (pH about 2.0) overnight. Rinse it with deionized water after taking it out.
Glycine-hydrochloric acid buffer preparation method: Take 30.6 g NaCl, 39.2 g glycine, add deionized water to make the volume to 523 mL, add 1 N HCl 477 mL, and configure to 10 x buffer. Use 1:10 dilution. Seals that are heavily contaminated should be replaced.
6. After the parts are dried, apply the original silicone oil to the piston and the sealing ring.
7. Rotate and install the pipette in the opposite direction of the second step.
For pipettes with infectious contamination, cover the pipette during ultrasonic cleaning, and sterilize the pipette in a sterilization pot at 121 ℃ for 20 minutes after ultrasonic cleaning, and then perform subsequent cleaning. In addition, semi skirted 384 PCR plates, PCR stripe tubes, micro-centrifuge tubes, sterile 96 deep well culture plate, etc. should also be sterilized.
Sometimes in order to reduce the risk of infection, a high-temperature sterilization operation is the first step. Note that if there is condensed dirt inside and outside the pipette body, the unclean high-temperature sterilization operation may not achieve complete disinfection and may damage the pipette. Liquid container.
Finally, it must be emphasized that it is recommended to use pre-installed sterile filter tips for PCR detection experiments. It can avoid the risk of contamination caused by the manual installation of the tip, and avoid the risk of false positives caused by inhaling aerosol when handling samples.